Saturday, 15 September 2012

Walnut Mooncakes


Walnut Mooncake is my Dad's & mine favourite.

In the past, I used to buy from Harbour City Restuarant which sells very nice Walnut Mooncake. However, 3 years ago.. I cant find it anymore... searching high and low for it... but was in vain.
then I got to know that the restaurant is no longer in business....

Sadly.. we have not taken that for these 3 years as I am unable to find good ones. Recently, I google for the recipe of this moon cake and was so happy that I found it and it seems that its a good one since so many food bloggers has had tried it out.

Today, I finally given it a go to try it...

Thanks for the food bloggers for the generous sharing of the wonder recipes.

Walnut Mooncake (Source from Baking Mum)

Ingredients :

360g Plain flour
25g custard powder
1/2 tsp Sodium Bicarbonate
50g Icing sugar
50g Shortening
220g butter (Salted)
1/2 tsp vanilla extract
1/2 tsp Ammonium Bicarbonate - Omitted
1 egg
Walnut for decoration

Filling:
1 kg Lotus paste - used White Lotus paste (Less sugar)
200-250g walnut (Toasted and Chop) - I replaced with melon seeds

Method :

1. Cream sugar, shortening, butter, vanilla extract together till slightly white (Slow speed first then change to high speed.

2. Gradually add in egg.

3. Lastly, add in the sifted flour,  custard powder and sodium bicarbonate to knead to a dough (Don't mix too long). Leave the dough in fridge overnight or for few days.

4. Take out the dough from fridge and divide into each portion of 20g each.

5. Divide the fillings into 30g each. (If you like egg yolk, filling 25g to wrap the 1/2 yolk) 

6. Wrap fillings into dough and decorate with walnut. Apply egg wash and bake at 160C for 10 mins. Take it out and leave it for about 10mins and apply egg wash again. Bake for another 15 mins.


He has been eyeing and eyeing ever since this tray is out of the oven..... and he finally get to taste...
He took 2 at a shot....  if not of me stopping him.... he is out for 3rd serving...... hahaha....


Really a nice nice recipe.. Thanks so much for sharing.... Its really Yummy!!


Tuesday, 28 August 2012

Black Forest Cake

Today is hubby's birthday.

Initially, I was thinking of whipping up a delicious breakfast after I send  my 2 little 小顽皮 to school. However he mentioned that he have had got an appointment with his colleague.. I head home planning to start the Black Forest Cake Baking. Who knows.. he said his call leg fly his kite.. so he said," Let's head to market for breakfast."

After breakfast, I head out to supermarket to pick up the groceries for tonight's dinner. There after, I began my cake baking. Originally, I am suppose to make this Black Forest cake for my Daddy's birthday which was last Sunday. Unfortunately, I was down with migraine. So I am making it today.


Of cos there are some simple dishes which i whip up for the family which i will post later when I  am available.


Just tasted it... wow.. it taste good.. with the moist in the cake and lots of the cherries.. yummy.. My hubby & kids love it :) 

Recipe is adapted from Joy of Baking

Ingredients : 


Cherries
24 ounce (700 ml) jar of Morello Cherriesin syrup
4 tablespoons Kirsch or Cherry Brandy - Omitted
1/4 cup (50 grams) granulated white sugar


Chocolate Genoise:

3 tablespoons (42 grams) hot melted unsalted butter
1/2 cup (60 grams) cake flour
1/4 teaspoon salt
1/3 cup (30 grams) unsweetened regular or Dutch-processed cocoa powder
4 large eggs
2/3 cup (135 grams) granulated white sugar - used only 65g
1 teaspoon pure vanilla extract


Whipped Cream Frosting

2 1/2 cups (600 ml) heavy whipping cream (double cream) (35% butterfat)

1 teaspoon pure vanilla extract

3 tablespoons (35 grams) granulated white sugar 


Method: 


Cherries:

Drain the cherries, reserving the liquid. Place the cherries in a bowl and toss with 2 tablespoons Kirsch. Cover the bowl with plastic wrap and set aside. Place 1 cup (240 ml) of the reserved cherry syrup in a small saucepan, along with the sugar, and heat until sugar has dissolved. Remove from heat, add 2 tablespoons Kirsch, and let cool.

Chocolate Genoise: 

1. Preheat oven to 350 degrees F (180 degrees C). 


2. Butter, or spray with a non stick spray, a 9 inch (23 cm) round cake pan and line the bottom of pan with parchment or wax paper.

3. In a bowl, sift the flour, salt and cocoa powder.

4. In a heatproof bowl whisk the eggs with the sugar. Place over a saucepan of simmering water, and whisking constantly, heat until lukewarm (about 5 minutes). Remove from heat and transfer to the bowl of your electric mixer. Beat on high speed until the mixture is thick (about 5 minutes) (the batter will fall back into the bowl in a ribbon-like pattern). 

5. Beat in the vanilla extract. Then sift about one-third of the flour mixture over the egg mixture and gently fold in using a rubber spatula or whisk. Sift and fold in another third, and then fold in the rest. Take 1 cup of the batter and fold it into the melted butter (to lighten it). Then gently fold it into the egg batter. Pour into your pan, smoothing the top.

6. Bake for about 20 -25 minutesor until a toothpick inserted into the center comes out clean (cake starts to shrink from sides of pan). Cool on a metal rack before removing from pan. The cake can be stored for two days or frozen for a month.

Whipped Cream Frosting:

In your mixing bowl place the whipping cream, vanilla extract, and sugar and stir to combine. Cover and chill the bowl and wire whisk in the refrigerator for at least 30 minutes, then beat the mixture just until stiff peaks form.


Assemble Cake:


Using a sharp knife, cut the genoise, horizontally, into two layers. 

Turn over the top layer of the cake (top of cake becomes bottom) and place on your serving plate. 

Brush the cake layer with 1/4 cup (60 ml) cherry syrup.

Take 1 cup of whipped cream and spread on the moistened genoise.Place the cherries evenly over the cream

Brush the cut-side of second genoise layer with 1/4 cup (60 ml) syrup

Place cut-side down on top of the cherries, gently pressing to compact. Reserve one cup (240 ml) of whipped cream and spread the remaining cream over top and sides of cake

Place reserved cream in a pastry bag fitted with a large star tip and pipe rosettes on top of cake. Cover and refrigerate the cake for several hours (or overnight) before serving

Decorate with fresh cherries and shaved chocolate.


Saturday, 25 August 2012

Simple Meal for My Daddy's Birthday

It was my Daddy Birthday and this year we have opted to have home cooked food this year.

It is then my job to crack my brain what to cook for the family as both sister-in-laws cant cook. So I have decided the following dishes on my Menu :

Longevity Noodle
Braised Duck (Dad's favourite)
Sweet Sour Pork
Fried Chicken
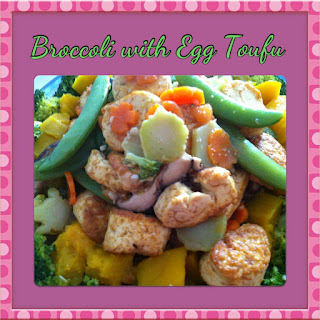
Broccoli with Egg Toufu
Butter Cereal Prawn
Grilled Pork Ribs

The preparation of the menu starts the day before the actual day as I love the food to be well seasoned and flavours to be absorbed into the food. 

Braised Duck is something which i started as it need a couple of hours to prepare. 

Spare Ribs

8 pcs of Spare Ribs
6 tbspn Hua Tiao Jiu
1/2 bottle of Master Food Red Wine & Garlic Marinate
2 tbspn of Honey

Method:

1. Season all the above ingredients for at least 4 hours.

2. Preheat the oven at 250C. 

3. Place them in a grill pan and grill for 15 mins on each side. Max is 30 mins as the meat will be tough if cooked for too long.

The verdict for this dish...  Yum Yum & fingers licking..


Sweet & Sour Pork

Ingredients:

A: 
800 g pork (I dont know which part cos I just tell uncle what I need it for)
5 tbsp Hua Tiao Jiu
5 tbsp Sesame Oil
4 tbsp vegetarian oyster sauce

B:
1 egg
Cornflour (aga aga)

C:
1 Big Onion
1 Japanese Cucumber
1 can of longan
4 tbsp Ketchup
1/2 lemon (extract the juice)

Method:

1. Season all the ingredients for at least 4 hrs.

2. Add in the egg, mix well then follow by the cornflour (based on estimate).

3. Fry the meat till the golden brown then set aside to drain off the oil. 

4. Stir fry the onion,then add in the cucumber and longan and quick fry. Add the Ketchup, lemon juice then bring to boil. Add the the pork and ensure its evenly coated with the sauce.

5. Ready to serve. 


Fried Chicken

Ingredients:


A:
1 Whole Chicken (Debone)
6 tbsp Hua Tiao Jiu
6 tbsp Sesame Oil

2 packets of Kogi Chicken Powder Mix

Method :

1. Season all the ingredients in A for at least 4 hrs.

2. Heat the oil in a wok. 

3. Dip the chicken in the powder and fry till golden brown.


Butter Cereal Prawn

Ingredients :

700g large prawns (i de-shell for the ease of eating :P)
1 egg
Some Cornflour

3 sticks of curry leaves
300g Nestum Cereal
2 tbsp of milk powder
1/2 tbsp icing sugar
100g butter

Method:

1.  Add the egg into the prawn. Add in the the cornflour and allow it to absorb slightly.

2. Shallow fry the prawn till crispy. Set aside too drain off the oil.

3. Heat the wok, add in the butter and stir it gently. Add in the washed curry leaves fry till crispy. Add in Cereal (Already mix well with the milk powder and icing sugar). and fry till well mix. Pour in the prawns and stir well then serve.


Overall, everyone enjoyed all the dishes prepared and of course I am happy though its tiring afterall I prepared almost all the stuffs with some help from my younger brother :)

Friday, 10 August 2012

Cake Decoration classes.....

Yesterday I was browsing through the website looking for some courses on cake decoration. And I came across Creative Culinaire by Ms Judy Koh which looks interesting to me.

http://www.creativeculinaire.com/courses/cake-baking1.html

I called to make a reservation for the upcoming course which stretches over 4 weekends commencing in Aug to Sep. To my dismay, it was fully booked.. Now I am on wait list.. Looking forward for the new schedule.


Sunday, 5 August 2012

Old Time Favourite ~ Pandan Chiffon Cake

With all the news which upset me... 
Baking is one of the best thing which I do which will help to cheer me up...

Its the all time favourite Pandan Cake...

I have modified the recipe slightly to the texture which I like... 
I like those moist type like Bengawan...

The Modification is only adjustment of the Coconut milk to 150ml & Corn oil 20ml.

Ingredients :

A: 5 egg yolk
   20g caster sugar
   85g cake flour
   100ml coconut milk
   30 ml corn oil
   1.5 tsp pandan paste


B: 5 egg whites
    70g caster sugar


** used latest 255g coconut milk + 40ml corn oil
1 tsp lemon juice into egg white
Can reduce to sugar to 50g

Method:

1. Beat the egg yolk and sugar till thick and fluffy. Pour in the corn oil and coconut milk and beat till well mixed. Sift the cake flour into the mixture and fold till well combined.

2. In a separate mixing bowl, beat the egg white till foamy. Pour in about 1/2 of the Sugar and continue to beat. Add in the rest of the sugar and beat till firm peak. Then reduce the mixer speed to lowest and beat for 1min. This will help to reduce the air particles in the mixture.

 3. Pour in 1/3 of the egg white into the egg yolk mixture and fold in gently into the egg yolk mixture. After its well combined, pour in the rest of the egg whites n fold till well combined. 4. Pour the mixture into the baking tin and bake in the preheated oven of 180C for abt 40mins.


Wednesday, 1 August 2012

My cake baking session for my last day...

It has been very busy week for me...
The new gal is coming on board tomorrow and there were so many things to I would like to go through with her so that hopefully she got a good overview picture.

Lots of mix feelings but to date I have no regrets on my decision to leave and spend time with my kids.

Nevertheless... just as a appreciation of the my dearest colleagues n specially to my kakis...

Never had I make so many variant of the cakes in 3 hrs and of which 2 are new....
They have been my "白老鼠" for my cakes testing and has been very supportive and gave me feedback. Good ones and definitely how the desired texture.

The cakes which i have made were Brownies Cheesecake, Blueberry cheesecakes & Mango non-bake cheesecake.

Brownies Cheesecake


Blueberry Cheesecake

Mango Cheesecake
Brownies Cheesecake (From Kelvin Chai 我和芝士蛋糕的秘密

Ingredients

Brownies Layer:
150g Chocolate (Broken into small pieces) - Used 200g
60g butter
60g brown sugar
2 eggs
1 tspn vanilla essence
50g plain flour
50g walnut - Used almond slices instead as I do not have walnuts
50g raisin

Cheese Layer:

400g cream cheese
100g caster sugar
2 eggs
300g yoghurt
1 tbspn cornflour

Topping :
1tsp cocoa powder
2 tspn water

Method:

1. Grease a 8-inch baking tin. Line with aluminium foil. Preheat oven to 180C.

2. To make brownies, melt chocolate and butter over low heat. Remove from heat, stir in brown sugar till sugar almost melt. Stir in eggs and vanilla essence, mix well.

3. Fold in sifted flour, chopped walnuts and raisin. Pour mixture into prepared tin. Bake for 20 mins.

4. To make the cheese layer, beat cream cheese and sugar until smooth. Beat in eggs, one at a time, beating well after each addition.

5. Beat in yoghurt and cornflour until blended. Reserve 1 tbspn cheese mixture for topping, the rest of the mixture to pour over the brownies.

6. To make the topping, mix well cocoa powder with water. Add in 1 tbsp of reserved cheese mixture, stir until blended. Drizzle over the surface of the cheese mixture and draw marble pattern with skewer.

7. Continue to bake in oven at 180C for 30mins for until lightly brown. Remove from heat and leave to cool. Chill in fridge.


Mango Cheesecake (Also from the book)

Ingredients:

Base :

300g crushed marie biscuits - Used digestive biscuits instead
60g chopped walnut - omitted
2tbsp brown sugar - omitted
180g melted butter

Filling:

250g cream cheese
100g caster sugar
1 tbspn gelatine powder
3tbspn water
120g sour cream
2 tbspn lemon juice
200g mango puree  - used unsweetened one
1/2 tspn mango essence - omitted cos I do like to add artifical flovouring

Method:
1. To make the base, stir all the ingredients until combined. Press mixture evenly into base and side of the cake tin. (Me being lazy ... only does the bottom base)

2. To make filling, stir gelatin powder with water over simmering water until dissolved.

3. Beat cream cheese and sugar until smooth. Fold in sour cream, lemon juice & mango puree. Then stir in gelatin.

4. Pour filling into prepared crust. Chilled until set, several hours or overnight.

5. Decorate as desired.


Sunday, 1 July 2012

Peach Chiffon Cake

This has been sitting in my draft for long long time... due to my work schedule... 
I have not been diligent enough to do any upload... 

All thanks to the book which i have bought (孟老师series) which comes with DVD :)

I Finally got the correct texture which i am looking for  :)


Here are the ingredients :

Ingredients A :  5 egg yolks
                         20g sugar
                         85g cake flour
                         45ml milk
                         45ml corn oil
                         1tsp of vanilla extract
                         
Ingredients B:   5 egg whites
                          70g sugar


Method:
1) Beat the egg yolks and sugar till thick and fluffy.
2) Slowly pour in the vanilla extract, corn oil and milk and beat well.
3) Sift the cake flour into the egg yolk mixture. Mix well and put it aside.
4) Beat the egg white in a separate bowl till it there is some volume then add in the sugar and continue to beat till it forms a firm peak. 
5) Fold in 1/3 of the egg white and fold well into the egg yolk mixture.
6) Fold in the balance 2/3 of the egg white till evenly mixed.
7) Pour into the tube pan and bake in a pre-heated oven of 180C for 40 to 45 mins. 
8) Invert the tube pan allow it cool completely before removing from the pan.


Tuesday, 19 June 2012

Pandan Chiffon Cake

 Pandan Chiffon Cake

This is an overdue post..
On Sunday, just have some sudden craving for Pandan cake... so decide to make 1...
On Tuesday, when I am back from work..

M : How is the Pandan cake? Did you all finish all of them?
S : Yes mummy. All finished and ah b ate a lot..
M : That good
S : Mummy, can you make one for me now again for tomorrow?
M: Em... Okok.. (Cos I still have leftover coconut milk from yesterday) and its just 15 mins work :)


 Ingredients :

A: 5 egg yolk
   20g caster sugar
   85g cake flour
   100ml coconut milk
   30 ml corn oil
   1.5 tsp pandan paste


B: 5 egg whites
    70g caster sugar

Method:

1. Beat the egg yolk and sugar till thick and fluffy. Pour in the corn oil and coconut milk and beat till well mixed. Sift the cake flour into the mixture and fold till well combined.

2. In a separate mixing bowl, beat the egg white till foamy. Pour in about 1/2 of the Sugar and continue to beat. Add in the rest of the sugar and beat till firm peak. Then reduce the mixer speed to lowest and beat for 1min. This will help to reduce the air particles in the mixture.

 3. Pour in 1/3 of the egg white into the egg yolk mixture and fold in gently into the egg yolk mixture. After its well combined, pour in the rest of the egg whites n fold till well combined. 4. Pour the mixture into the baking tin and bake in the preheated oven of 180C for abt 40mins.


Saturday, 9 June 2012

Swiss Roll with Coloured Rice

My sons have been asking to me to make this for them for quite a while....
However due to my busy schedule.. I have not been able to try it out...
Finally.. today.... I have some time and my friend is at my house...
So decided to give it a go.....

Here it is.... Swiss Roll... and I am so happy that its rolled so nicely...
Finally... I Got it!! Yippie!


Ingredients:

A   : 5 egg yolks
       25g caster sugar
       85 g cake flour
       45ml corn oil
       45ml milk
      
B   :  5 egg whites
        85g caster sugar

C   :  80g unsalted butter
         20g icing sugar
         40ml milk


Method for the cake:

  1. Preheat the oven to 190C . Line the baking sheet in the baking tray.
  2. Beat the egg yolks and sugar till thick and fluffy. Add in the corn oil, milk and vanilla extract and beat well.
  3. Sift in the flour and mix well using a whisk.
  4. In a separate bowl, whisk the egg white and sugar till stiff at high speed till stiff. then beat for at low speed for 1 minute to stablise the air bubbles in the mixture.
  5.  Fold in 1/3 of the mixture of into egg yolk mixture. Fold in gently to avoid pressing out all the air in the egg white. Fold in the balance of the egg white till even.
  6. Pour the mixture into the baking tray and spread them out evenly.
  7. Bake in the oven for 12 mins.
  8. Remove the cake from the baking tray once its baked and allow it to cool.
 Method for the cream:
  1. Cream the butter and sugar till pale white
  2. Add in the milk and beat till mix well with the butter.
Rolling:
  1. Flip the cake into another sheet of baking sheet.
  2. Spread the cream on the cake evenly
  3. Roll the cake and wrap up and refrigerate to set the shape.
  4. Apply a thin layer of cream on the outer layer & sprinkle the coloured rice on the cake.


Sunday, 20 May 2012

Raisin Cranberry Bread

65C Tangzhong Bread is another book i bought recently.

Decided to try home made loaf for my sons tmr recess.
Though its a lot of work n lots of kneading but i think is worth it.

Home made bread taste better than outside..
with no chemical improver ...  all natural ingredients.


Tuesday, 1 May 2012

Hokkiado cupcake (2nd attempt)

Today is my 2nd attempt on Hokkaido cupcake..

Somehow it dun seems to be able to raise as good as the Nasi Lemak has...
I wonder what's wrong?
Could it be too much or the way i handle.. :(
Though it taste nice but its not as perfect as i would be...

Chocolate chip chiffon cups :)

My Hokkaido Cupcake.. but seems not as ideal as .. :(


Saturday, 28 April 2012

Ambon from Indonesia


This Kueh has a very special and taste.. Guess what.. Lemongrass fragance... 
Smell so so nice and refreshing...
This is from our neigbour who bought it from Indonesia. :)
Yummy ... 

Sunday, 22 April 2012

My Favourite Tiramisu

Tiramisu is my favourite cake..
I have tried a couple of them and so far this is my favourite. The thing i like about this recipe is that it is so so simple :) something really easy to made to satisfy my dessert craving.

Ingredients:

3 eggs, separated
1/4 cup (55g) caster sugar [I have reduced by half as i dun like too sweet :P]
250g mascarpone cheese
3 tabspn of Marsala/Tia Maria/Rum/Kahlua
185ml warm espresso/ strong coffee
150g of sponge fingers
cocoa powder, to dust

Method:
1. Using an electric mixer, beat egg yolk and sugar till thick and pale. Using a large spoon., fold through the mascarpone.

2. Whisk the egg white till peak forms. Carefully fold into the mascarpone in 3 batches.

3. Add Kahlua to the warm espresso.  Place in base 1 layer of the mixture,Quickly dip the sponge fingers, one at a time, in the coffee mixture. Then lay the sponge fingers on the mixture. Cover with another layer of mascarpone mixture and repeat another layers. Refrigerate overnight or at least for 4 hours before serving.Dust with Cocoa powder before serving.
All the ingredients were ready


Ready for chilling overnight
Ready to be eaten ... Yummy

Tuesday, 17 April 2012

Hokkaido Cupcakes


Hokkaido Cupcake


Last weekend, hubby and I were walking around Thomson plaza while waiting for the kids to finish their classes. There was this temporary stall which was set up selling Hokkaido cupcakes. It looks so so nice.. but its a bit pricy from what i think.. so i resist the temptation of buying.... so what i done is to google to find... recipe....

Yeah found it.. and its so so nice and well presented.. this inspires me to make... hee..
happen that my son is having a field trip to the Science Centre.. he requested mummy to make for him to bring on the day of outing..

I made it for him.. after my work... it took me 3 hrs for the whole process.. 1st time making chiffon type of cake.. therefore a bit messy.. i believe the next time will better.. although it didnt look as good as the one from Nasi Lemak but i am very happy with what i have baked.  Its so so light ... yummy yummy :) Really a big thanks to her for sharing such a wonderful recipe.


3 egg yolks
20g sugar
35g corn oil
60g milk
70g cake flour

3 egg whites
25g sugar

Filling
60g dairy whipping cream
10g sugar
1tsp instant custard powder

Icing sugar, for dusting

Method
1. Pre-heat oven to 170C.
2. Arrange paper liners on baking tray.
3. Hand whisk egg yolk and sugar till pale in colour.
4. Add in corn oil and milk, mix well.
5. Sift in cake flour, stir to combine.
6. Beat egg white until foamy, gradually add sugar, and continue beat till soft peak form.
7. Take 1/3 of egg white and use a hand whisk to mix into egg yolk batter.
8. Fold in the balance egg white with a spatula till well combine.
9. Scoop batter into pre-arranged paper liners to about ¾ full.
10. Bake for 20-25 mins at middle rack.
11. Beat whipping cream with sugar till firm and stiff (over a bowl of iced water).
12. Add in custard powder, mix well.
13. Pipe custard cream into cupcake and dust with icing sugar. Refrigerated before consume.


Sunday, 15 April 2012

Marble Cheesecake


Still have 1 kg of cream cheese...  what should i make....

What else... Cheesecake... emm.. what flavour....

Son tell mummy.. I want chocolate flavour....

Mummy: Chocolate is very heaty and now the weather is no good... how about marble? Deal?

Son: On!!!

So mummy modified from this recipe of mine.. and it still turn out great!

Ingredients

8 digestive biscuits (200g)

50g butter , melted (100g)

600g cream cheese (1kg)

2 tbsp plain flour (4 tsp)

175g caster sugar (200g)

vanilla extract

2 eggs , plus 1 yolk (4 eggs, 2 yolks)

142ml pot soured cream (used 400ml since i dont have enuff of cream cheese)

150g of baking chocolate, melted

some chocolate chips

1.Heat the oven to 180C. Crush 8 digestive biscuits in a food processor (or put in a plastic bag and bash with a rolling pin). Mix with the melted butter. Press into a 20cm springform tin and bake for 5 minutes, then cool.

2.Beat cream cheese with flour, caster sugar, a few drops of vanilla extract, 2 eggs, 1 yolk and pot of soured cream until light and fluffy. Pour 1/3 of the mixture into another mixing bowl and pour in the melted chocolate and mix well. Pour in the chocolate chips and u may add more if more..

Pour in a layer of the plain mixture, followed by the chocolate mixture then the  plain mixture again.

Use a satay stick to swirl the mixture. Steam bake for 40 minutes and then check, it should be set but slightly wobbly in the centre. Leave in the tin to cool.

*I mixed part of the plain mixture with banana and this tiny cheesecake ... has 3 flavours.. and it taste marvellous.. :)


Marble Cheesecake for my Colleagues :)

Banana Cheesecake for my son

Saturday, 14 April 2012

Pasta with Teriyaki Chicken


Running out of ideas what to eat...Open up and the fridge and see what are available.
Found chicken, mushroom and pasta sauce..
So decided to whip this simple meal.

Just got the marinate the chicken with Teriyaki sauce, and whip up the rest of the items.
Assemble them together ... and here is it... :) simple but balance meal.

Sunday, 1 April 2012

Durian cheesecake


One day, my friend posted Durian Cheesecake...
OMG!OMG!

Makes my dessert craving arises..
It looks so mouth watering... and i am so so... grrr

So she told me she got the recipe from Kitchen Corner

I tried it.. the taste was so so good..
Just that somehow the texture dun look as good as the one from Kitchen Corner... I guess is becos i added so much... of the durian.. lolz :)

But ... my younger son.... simply love it.. he actually took 2 slices at 1 shot..

My family and friends all said its very nice..

All thanks to Kitchen corner :)

For the base :
200g digestive biscuits
100g butter, melted

For the filling
500g cream cheese
60g caster sugar (reduced by 20g, cos I dun like too sweet)
300g durian flesh (220g is the original)
3 eggs (medium size, total about 160g)
90ml milk
1 tbsp + 1/4 tsp cornstarch

Toppings: 1 tsp cocoa powder + 2tsp water

Method:
1. To make the base, stir all ingredients until combined. Press mixture into base. Set aside.

2.To make the filling, beat cream cheese, sugar and durian flesh until smooth. Beat in eggs, one at a time, beating well after each addition.

3. Beat in milk and cornstarch until blended. Reserve 1 tbsp cheese mixture for topping, the rest mixture pour into tin.

4.To make the topping, mix well cocoa powder with water. Add in 1 tbsp of reserved cheese mixture, stir until well blended. Pipe on top of the surface of cheese mixture and draw net pattern with skewer.

5.Steam baked at 170C for 45 minutes (my oven 150C for 50 minutes) or until light brown.

6. Remove from the heat and leave to cool completely. Chill in fridge 5 hours or overnight.


Before
After